Showing posts with label skills. Show all posts

10/11/11

Vegan Mofo: Skills III: Vegan Lasagna

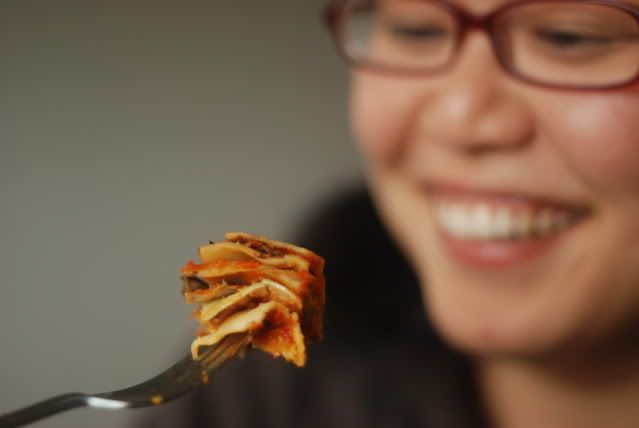
S-Y, enjoying the latest Vegan Mofo skill
Hey guys, isn't Vegan Mofo great? I'm loving the chance to find so many cool blogs I never heard of before, all cooking up gorgeous treats on the reg. My blogroll is going to be out of control by the time this month is over.

Any old ways, today I return to my mini-theme, Vegan Skillz. (With a "z", to appeal to the kidz.) That is, the stuff that all old-school vegans know how to do, and everybody else should learn. Today's skill is: Make a kick-ass lasagna.

Vegan Skill 3: Make a Kick-Ass Lasagna!
When asked, 99% of people would agree with the following statement: "Lasagna is my favorite food. It is the thing I like to eat on my birthday." Why? The answer is simple: layers of carbs draped in toothy tomato sauce with your choice of fillings in between. Its like eating several pizzas in every bite. (And who doesn't like that?)

However, when you go vegan you quickly realize that your favorite food is kinda gross. All that ricotta (with eggs in it? Why?) and greasy meat juice soaking it, and not enough sauce and too much mozzerella... it can go very wrong. That is why it is incumbent on you, my little friend, to create your own no-fail lasagna. It should be the ideal thing to bring to potlucks, to pull out of the oven on a rainy day,  to serve to your in-laws when your girlfriend comes out of the closet. (Happy National Coming Out Day, btw!)

So here's my favorite recipe, layers of crunchy baked eggplant with a fruity sauce, but look around the blogosphere for you favorite ideas- some have pinenut-cream stuffed inside, others are layered with spinach or artichoke, still others have faux sausage crumbles inside. Just make sure you have one recipe down, so you can always be sure to have in your repertoire something that pleases all of the people all of the time.
**********************
T's Famous Eggplant-Parma-sagna!

Sauce
-Glug of olive oil
-1 large white onion, diced
-4 cloves garlic, diced
-T. balsamic vinegar
-2 14 oz. cans diced tomatoes
-2 tsp. brown sugar
-1/2 tsp each marjoram and oregano
-crushed red pepper flakes (optional)

The Rest
-2 large eggplants, cut into 1/2" round slices
-1 cup bread crumbs
-olive oil or other oil
-1 package no-bake (eggless) lasagna noodles
-Nutritional Yeast or shredded vegan cheese
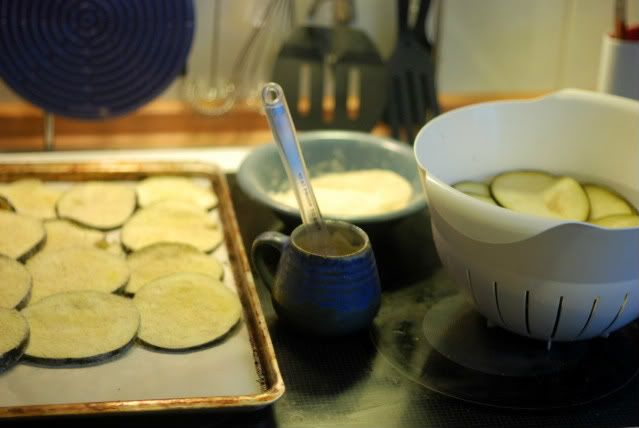
1.) First, get your eggplant station set up. Take your eggplant rounds and layer them, sprinkled with salt, in a large colander. Preheat your oven to 400 degrees (200 C) and layer two cookie sheets with baking paper. Beside them on work-space, place a bowl or dish filled with bread crumbs, and a small glass with olive oil  and a basting brush.

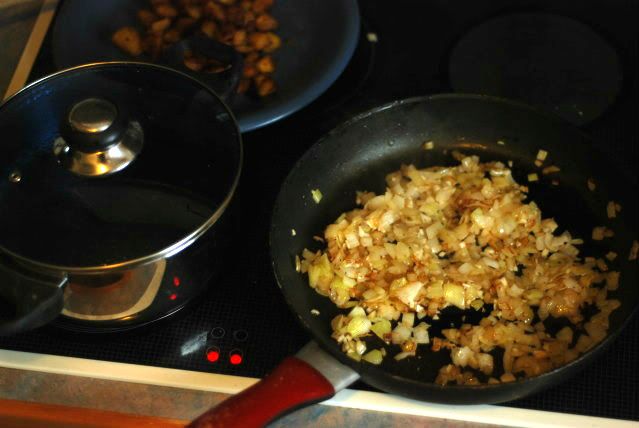
2.) Next make the sauce. In a pot on the stove, heat some olive oil over medium low. When oil is hot add in onions and a pinch of salt. After 2-3 minutes, add in garlic and cook together until soft and starting to brown. The add in balsamic vinegar to de-glaze. Cook for 1-2 minutes more, then add in rest of ingredients and raise heat to a boil. Cover, and lower to a simmer and let cook while you prepare the eggplants.
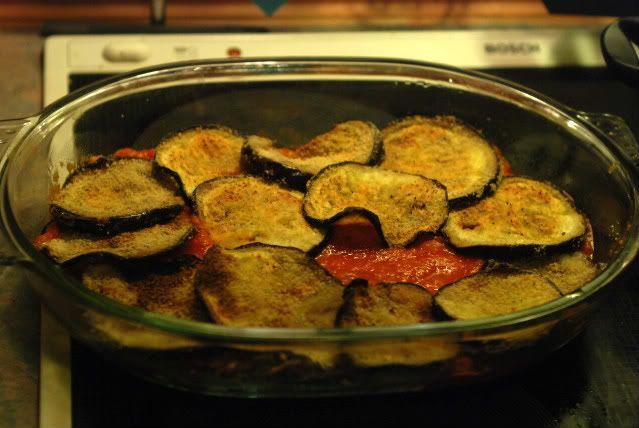
3.) Rinse the salt off eggplants and take them over to the bread crumbs. For each slice, pat dry with a kitchen towel, brush with oil, and dip both sides in bread crumbs.  Layer on cookie sheet and when they are all dipped, place both in oven and cook until golden brown and crispy.  While they cook (about 15-20 minutes), turn off heat under sauce, and if desired, blend with an immersion blender. Taste and adjust spices, then set aside for later use.

4.) Now we put it all together! In an oiled casserole dish, layer lasagna noodles, sauce, and baked eggplant rounds. When you get to the last of your eggplant rounds, put a layer of noodles and the rest of the sauce. On top of that, put a sprinkling of nutritional yeast and dried herbs, if desired, OR a layer of shredded vegan cheese. Cover with a tented piece of aluminum foil and cook 45 minutes at 400 degrees, then an additional 10 minutes with the tent off (you can even broil the top if desired.)

Serves 3-4
*********
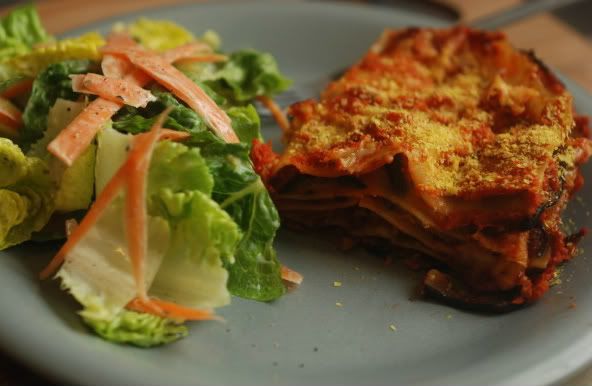
Serve with a side salad w/ creamy faux-caesar dressing and a glass of strong red wine. I really just ate this and I'm dying its so good, seriously.  I have got this skill down.

Song of the Day: Bright Eyes- Four Winds

10/6/11

Vegan Mofo: Skills- Cooking beans from scratch

Today's essential vegan skill is cooking beans from scratch- that is, transforming them from their dried state on the bottom shelf of the grocery store aisle into a big pot of saucy deliciousness. Why should you bother to learn this?
 1.) Buying a big bag of dried beans is cheaper than buying as many cans of beans! (And that's saying something, because canned beans are already kind of cheap.)
2.) You have more control over the flavor. Ever noticed all the gross salty water they pack in there?
3.) You get to have cred! Like, look! I took something that could take about ten seconds with a can opener, and stretched it over 2 days!

Ok, maybe I'm not selling this correctly. The truth is, if they had canned black beans in Europe readily available, maybe I would never have learned this "skill." But I still think people should try it once, because it can make a huge difference in the taste, and also, don't you want to know that you COULD make beans from dried if you needed to? If you were shipped off to war somewhere with no canned beans? And besides, you might find out that the taste is so much better that you always want to do it this way. And here's how!

Skill two: Cooking beans from scratch!
1.) Take your beans and spill 'em out somewhere to sort through them. My technique is to pour them about 1/4 a cup at a time onto a kitchen towel on the counter, sort them for rocks and broken pieces, then gather the towel at the top and dump it into my soaking container. (In this way, you can avoid spilling beans all over your kitchen at 11 o'clock at night like I always do.)

2.) Now for the soaking. As I demonstrated yesterday, you just need some kind of big container in which you place you beans and fill it with cold water. The best thing is to do this before you go to bed, stick it in the fridge, then it gets to sit the next day and they should be really ready by the time you want to cook them. (If you are making black beans, why not soak some cashews too and make cashew sour cream?)

3.) Alright now comes the rigorous part. After you beans have soaked as long as you can bear it (10-12 hours is usual for me) then you can start you cooking. Drain the beans in a colander than cover them with a few cups of fresh water in a large pot and bring that baby to a boil. Then reduce to simmer and cover, with a little room for steam to escape. (If you get some white foam at first you can skim it off with a spoon, though it won't hurt you.) How long you let it sit and simmer depends on many things: what quantity of beans you are cooking, how long they soaked, what phase the moon is in, and most of all, whether or not you have dinner guests. But I have found that the most common length of time is between 2 and 2 and 1/2 hours for 1 cup beans. You will have to keep adding more water periodically. (But don't add salt until the end!)

4.) In the meantime, you fry a bunch of stuff to put in them when they are done! (Terry Hope Romero calls this, "sofrito!") This is where your creativity comes in.  Good combos:
-Simplicity: garlic, onions and peppers
-mushrooms, garlic and onions
-potatoes, carrots, onions
-small tempeh pieces, peppers, onions
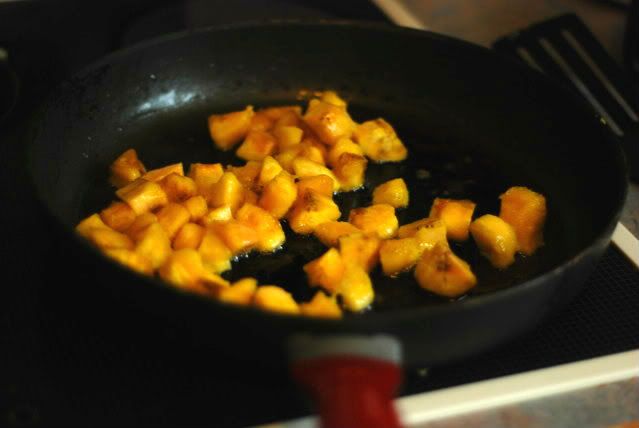
Last night I fried up some quartered plantains first of all, then setting them aside, used the same hot pan to cook a bunch of onions and garlic. It doesn't matter whether they stay hot because you are just going to add them into your beans.

5.) Now that you've done that, painted your nails, replied to all of your emails, and whatever else you can accomplish is 2 and 1/2 hours, you can check on your beans. When they are perfect, it won't be huge effort to chew one and they will be easily mashable with a fork. At that time, you can add in your "sofrito", as well as some canned or fresh diced tomatoes (1/2 cup per cup of beans is good, but add more for saucier beans), and some cumin. I also add in cayenne pepper at this point, and a pinch of paprika. Beans eat up spices so you need not be stingy, and feel free to be creative. (Like if you are one of those cilantro types.)

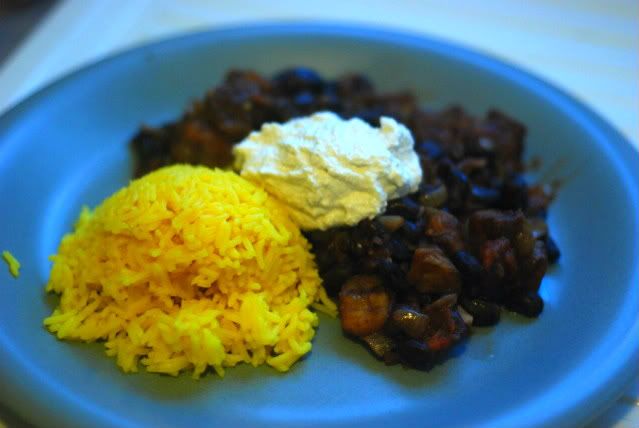
6) Let the beans cook another 10-15 minutes with all the new ingredients folded in, or as long as it takes to cook some rice. Taste and adjust salt and spices. Serve with rice and some cashew sour cream, or if you're in the mood, with hot sauce, pickled onions, avocados and mango... whatever you have on hand!

It may not be the most gorgeous dish, but its so delicious.


Q: "But T, this is just for black beans! Is it the same for other kinds of beans?"

A: Kind of! You can use a similar process for other types of beans (except for lentils), but they take different amounts of time and go better with other flavors. Red beans take about 1 and 1/2 hours, and go great with just garlic and onions and a tons of spices (served with coconut rice, yum!) Adzuki beans take less time, chickpeas take more. But once you've experimented with dried beans you will find that the process doesn't vary much and there is a big reward to cooking them this way- namely, the taste.

What do you prefer, canned or dried?

Song of the Day: MGMT- It's working

10/5/11

Vegan Mofo: Essential Vegan Skillz 1- Cashew Cream


Hey Mo-Foers! Now that I'm fairly settled back in Berlin and not moving to any other country's capitol that starts with a B until *at least* November, I can start a little bit with my very first Vegan MoFo "theme"!

Its not like I'm going to stick to this every day, because that's obviously too organized for me, however I thought it would be nice to have a little reoccurring item, namely, "Essential Vegan Skillz." I'm talking about those things that you learned how to do only when you started cooking vegan. The innovations made by the cookbook Gods, and perfected in the kitchen and in blogosphere. The simple tricks that have made everyone's life a little easier, and tastier. My idea is to explain the concept, demonstrate how-to, and then to show a few uses, maybe using other people's recipes as well. And then, hopefully, y'all will add variations and stuff in the comments!


First up: CREAMING CASHEWS for fun and profit

Who knows who first thought of using cashews to make a creamy base for dips, sauces, and sweets, but whoever it was may have been allergic to soy. After all, us vegans had to rely on on silken tofu for all of our cream needs for years, with short interludes of coconut milk... and to be fair, it wasn't such a bad choice. But sometimes you don't want to eat tofu in a soy based sauce washed down with a glass of soymilk. We vegans need variety as much as the next fool. Thus, was born the genius idea of blending cashews.

The basic concept is generally this: take raw, unsalted cashews and place them in a container with plenty of water, overnight. (Or at least for 8 hours, like, while you are away at work. )

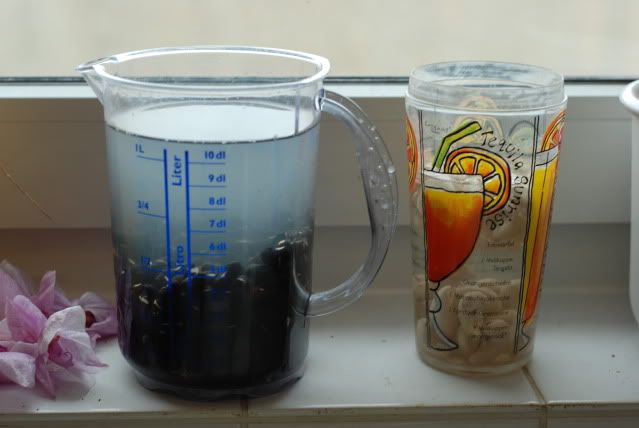
Cashews soaking, next to some black beans for tomorrow's "skill"
Blend a lot, and scrape the sides of your container with a spatula.
Next, you blend the plumped up cashews with a bit of liquid and some flavoring if you so desire, using a food processor or a handheld immersion blender.

Finally you have something that looks like this (or more liquid and creamier, if you added more liquid and blended longer.) It has a delicate taste and can be enhanced to suit your sordid needs.
Seen here as a topping for rice and beans- heaven
 Of course, there is my favorite use, as a sour cream substitute. (Both Vegan Brunch and Viva Vegan offer variations on this recipe.) A little bit of cooling vinegar blended in with the cashews, plus a little salt and you've got an excellent topping for spicy soups and beans. Used this way its also good blended with fresh herbs, onions, garlic or cucumbers for dips. The other main way I use it blended with a bit of agave nectar for a creamy compliment to pies, as seen below with peach pie.

In addition you can use it as a creamy base for casseroles and stove-top specialties. For instance, Isa uses cashews as the base for her awesome Mac and 'Shews. Its also the basis for her famous Rad Whip, an amazing whip cream substitute. You can even make cashew cheese as an app to serve your skeptical omni friends. (You use a cheesecloth to make the cheese more thick and creamy...yum!)

Once you have mastered the art of taming the cash(r)ew, there is no stopping what you can accomplish. Well, food-wise at least.

So that was my first "Essential Vegan Skillz" topic, stay tuned for more in the month to come!

Song of the Day: The Smiths- This Charming Man